How to unshittify your web browser: Making your web browsing a less distracting experience
03/07/2025

In this article I am going give a detailed walk-through that is beginner oriented to help users unshittify their web browsers. What is enshittification? Enshittification was coined by Cory Doctorow which explains how online platforms decline in service and quality over time. For me, this means it is hard to read articles on the web without being bombarded by annoying ads and pop-ups. The following steps will show you how to get around the enshittification of the web because we all deserve unimpeded access to information.
If you prefer visual learning, please check out my YouTube walk-through that goes through the same steps. You can find that video here. If you have some of these steps completed already (like already using Firefox), please skip to what you need. Also, I am not sponsored or affiliated with any of the software I am going over. This tutorial should work for Firefox on any operating system that isn’t on a phone or tablet.
This article can be broken down into these steps:
- Installing Firefox
- Cleaning up Firefox
- Installing Browser Extensions
- Disabling Google account popups
Installing Firefox
Although Firefox has come under scrutiny recently due to updated wording in their data gathering practices, I still recommend it because of the many useful browser extensions. Also Chrome and other Google products collect a ton of data and disabled uBlock Origin so shame on them. But if you are interested in other browsers, such as Brave or Tor, check out this article.
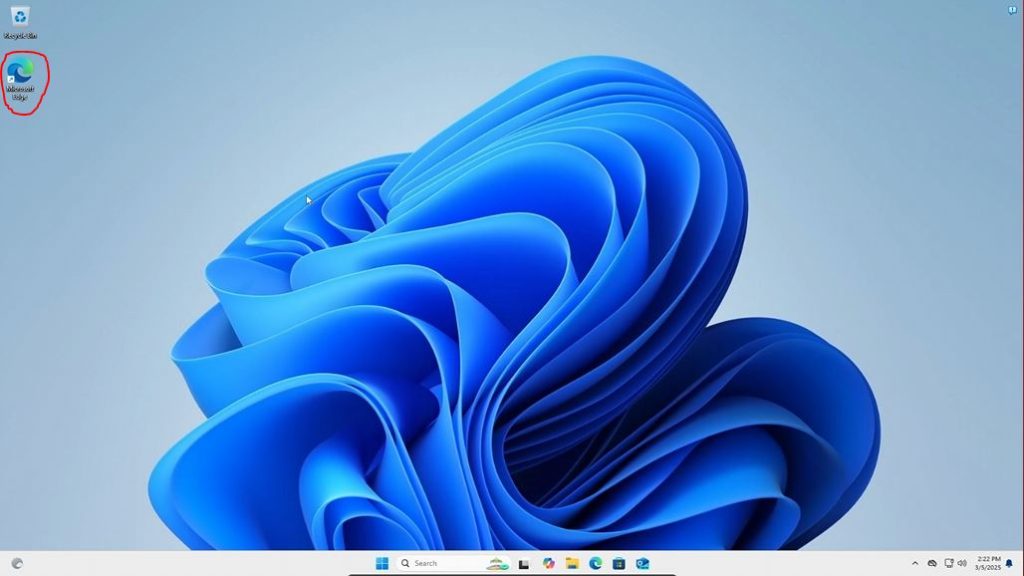
Anyways, the first step in installing Firefox, will be opening your current browser. I am currently using a fresh install of Windows 11, so this is Microsoft Edge for me.
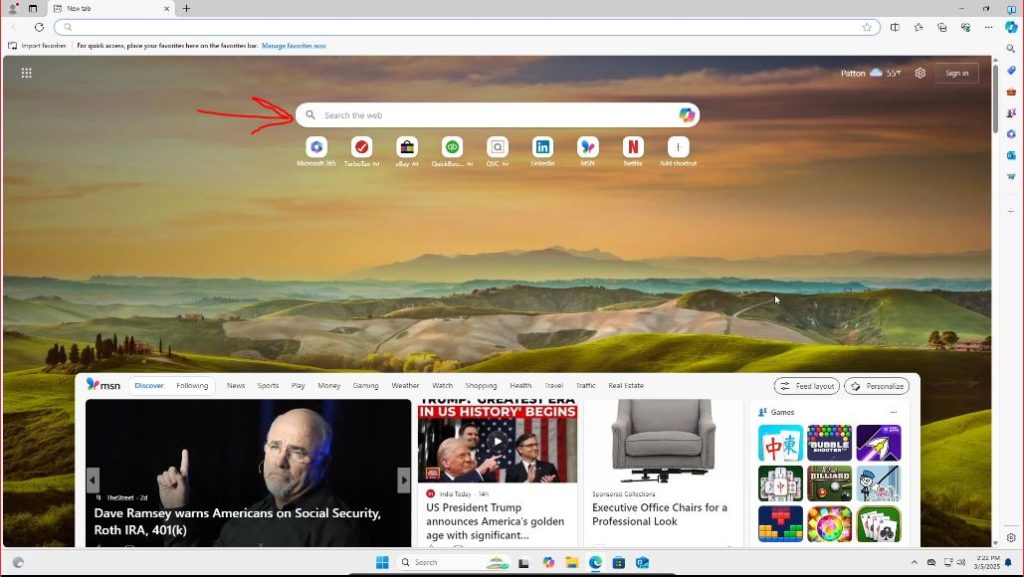
Once your browser opens, search for “Mozilla Firefox” in the search engine bar. Or alternatively type https://www.mozilla.org/en-US/firefox/windows/ in the URL bar or click this link to take you to the page.
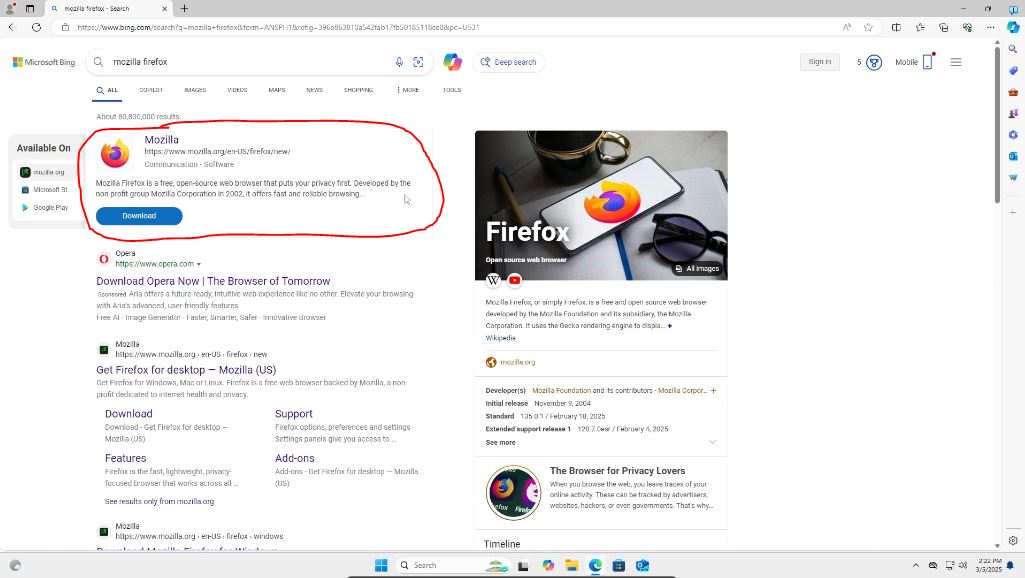
If you searched for Firefox, double check the link is the same as above, but most likely just click on the first search result.
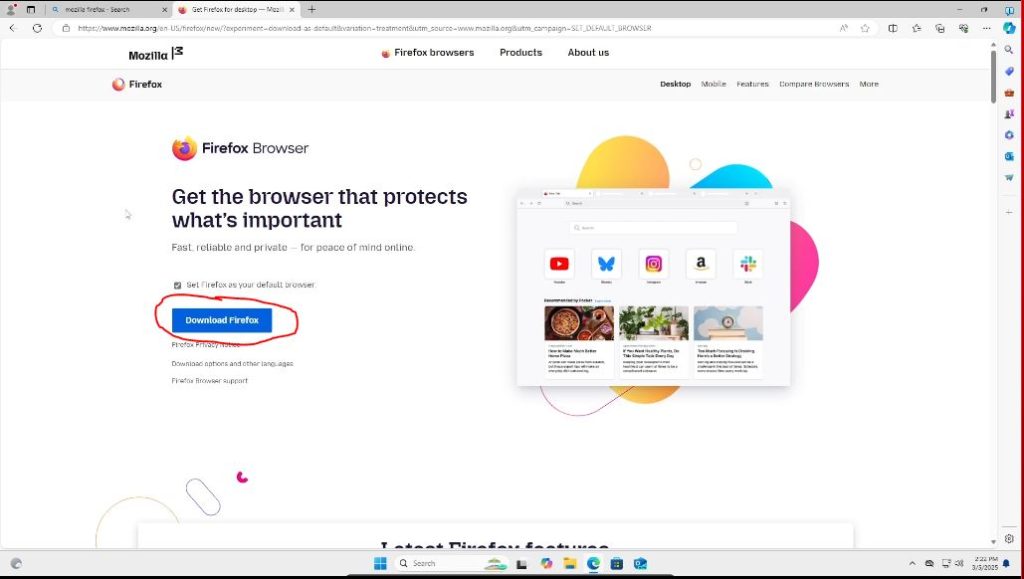
Then we can press the download button to get the .exe file to install the browser.
Click the open file in the top right hand corner of the page once the download is done and appears to begin to the download.

Or go to your file explorer and your downloads folder and find the download there.
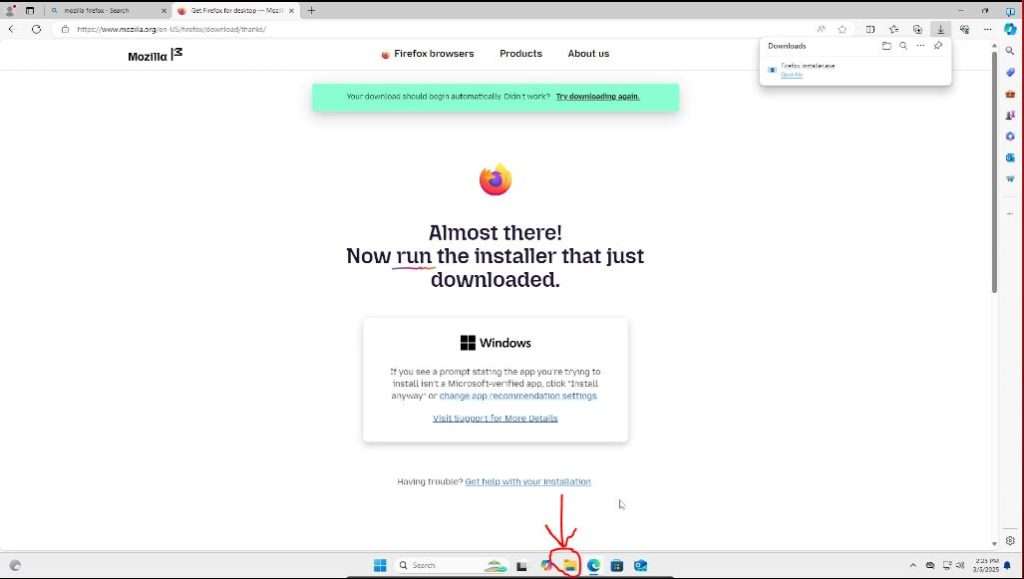
If you did this method, click on the downloads folder on the left hand side to take you to your downloads folder. Then double click the Firefox installer .exe.

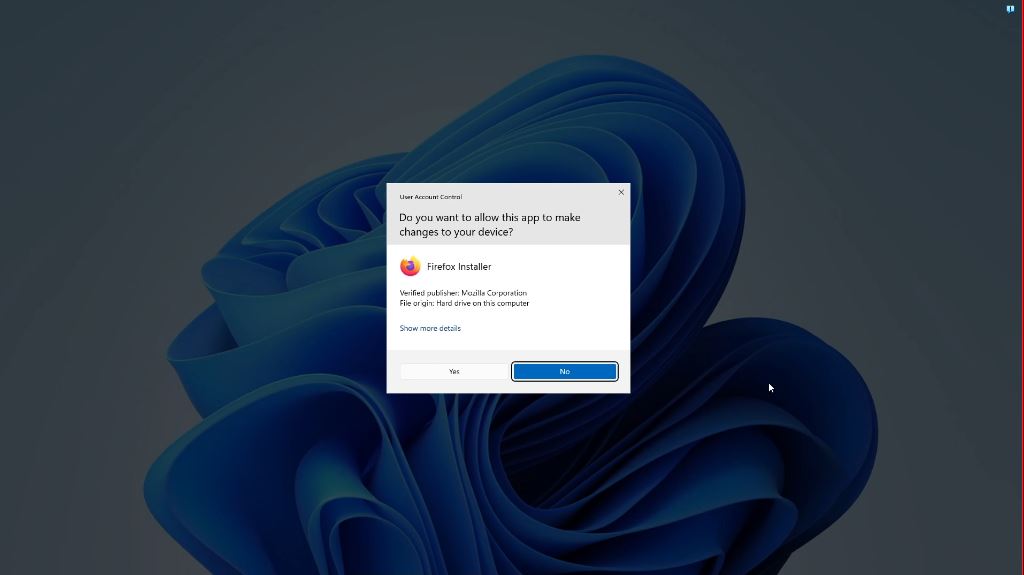
You may see a notification on the bottom of your task bar you must click on or a popup will come up like this below that you must press “yes” on for the download to begin.
The download will then begin. It should only take a couple of minutes to install.

Once done Firefox should automatically launch. If not, their icon should appear on your desktop under Microsoft Edge that you can click on to launch the browser for its initial setup. Once Firefox is running, you will be greeted with this page.
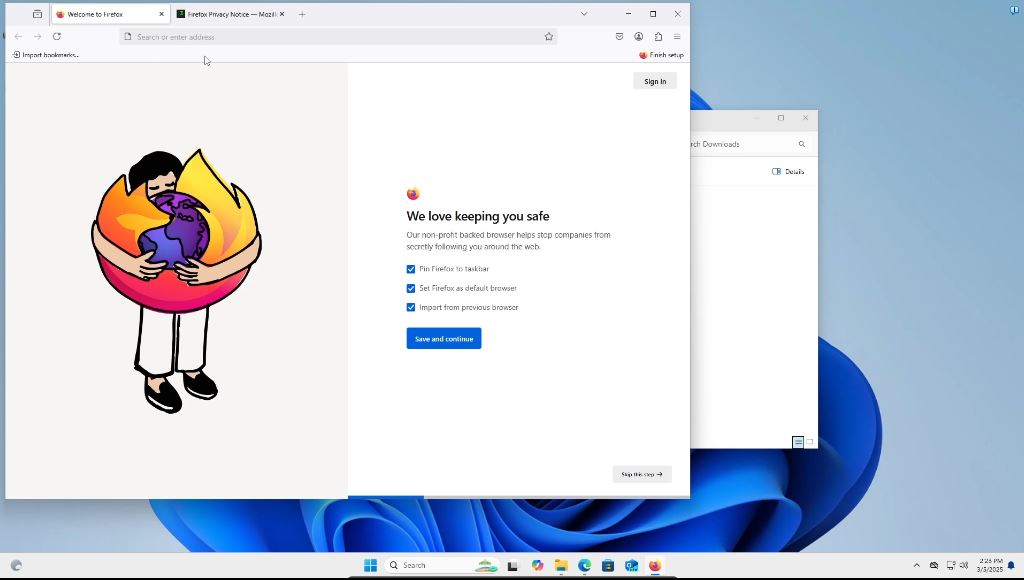
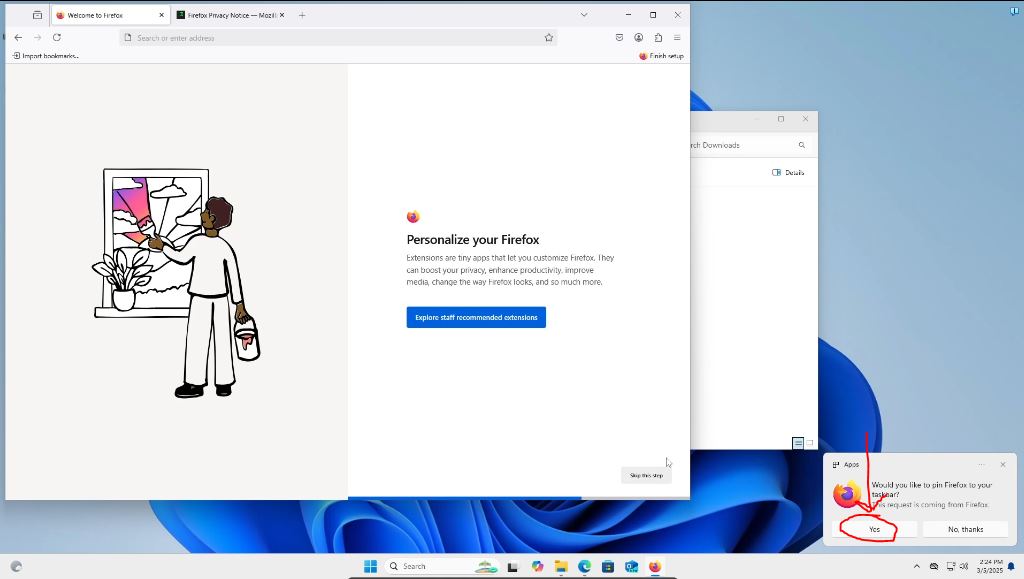
Choose the settings you would like here by checking/unchecking the check boxes. I kept the first two options checked and unchecked the third option and then pressed the save and continue button. If you set Firfox as your default browser, a windows popup should come up on the bottom right hand side of the screen asking if you would like to do so, press yes. I forgot to do so, so you will see in a few upcoming screenshots that pop-up box stay there. Also, I have used the import from a previous browser before when I switched from Chrome, it actually work remarkably well if you are interested.
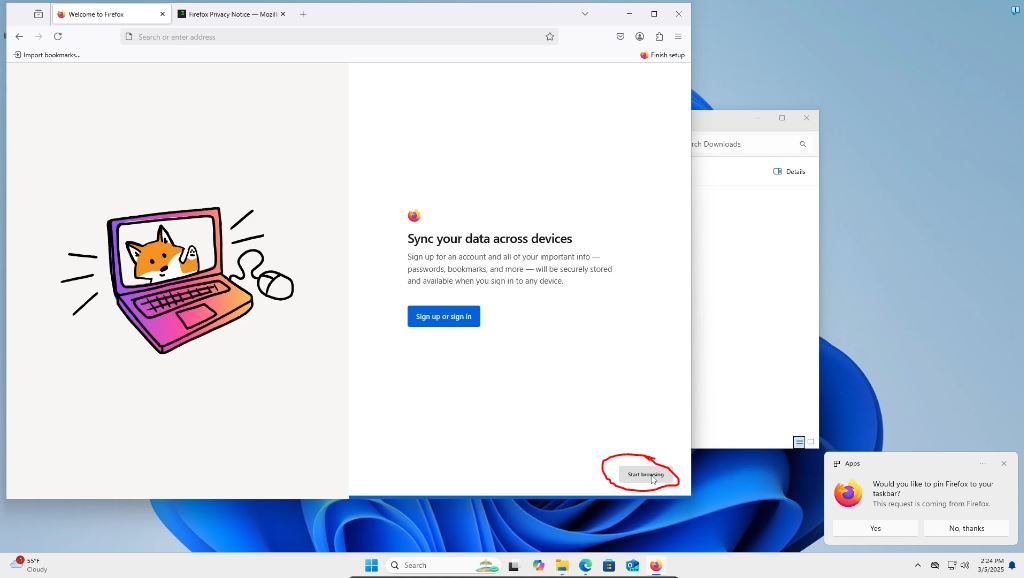
You will then be brought to this screen. Press “skip this step” in the bottom right hand corner of the browser screen unless you would like to customize it. Note, you can customize whatever you like after the initial setup is done.

You will then be brought to a screen where you can start browsing. Press the “start browsing button.”
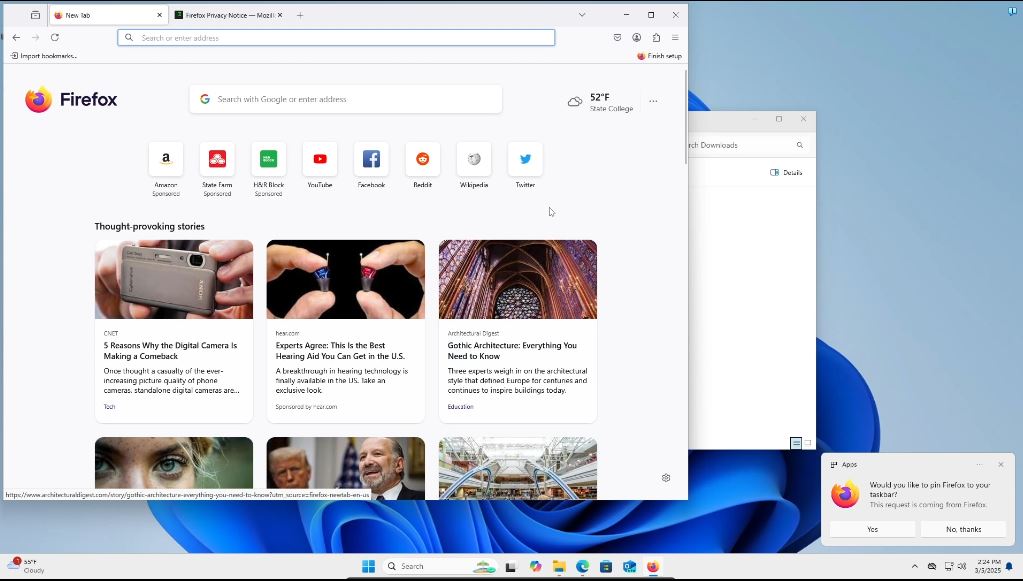
Then you will see your new Firefox browser!
Cleaning up Firefox
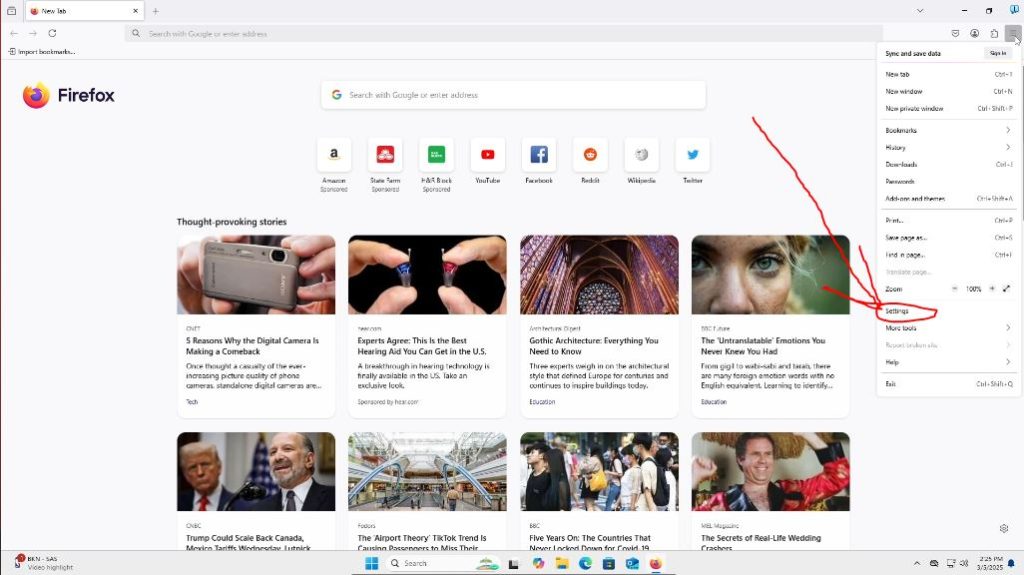
Firefox’s home page is quite cluttered in my opinion. All of the sponsored content and “though-provoking” stories are very distracting and visually unappealing. This can be easily changed though! First we can go to the top right hand corner of Firefox and click on the hamburger looking widget to open up the browser options.

Once the options menu pops up, we can then click on the “Settings” tab.
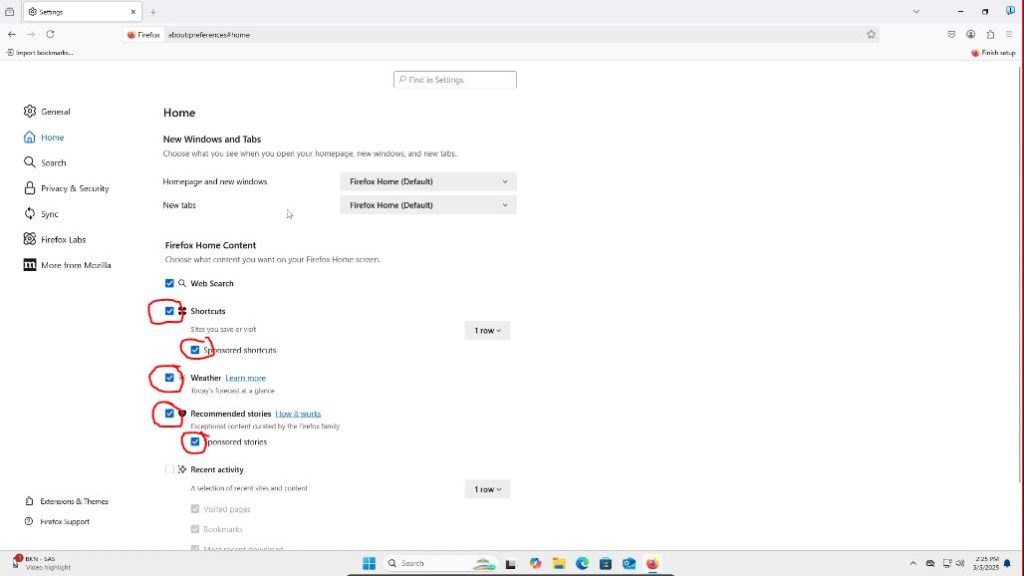
We will then be taken to a page that looks like this below. We will want to click on the “Home” tab on the left hand side of the screen below the “General” settings tab.
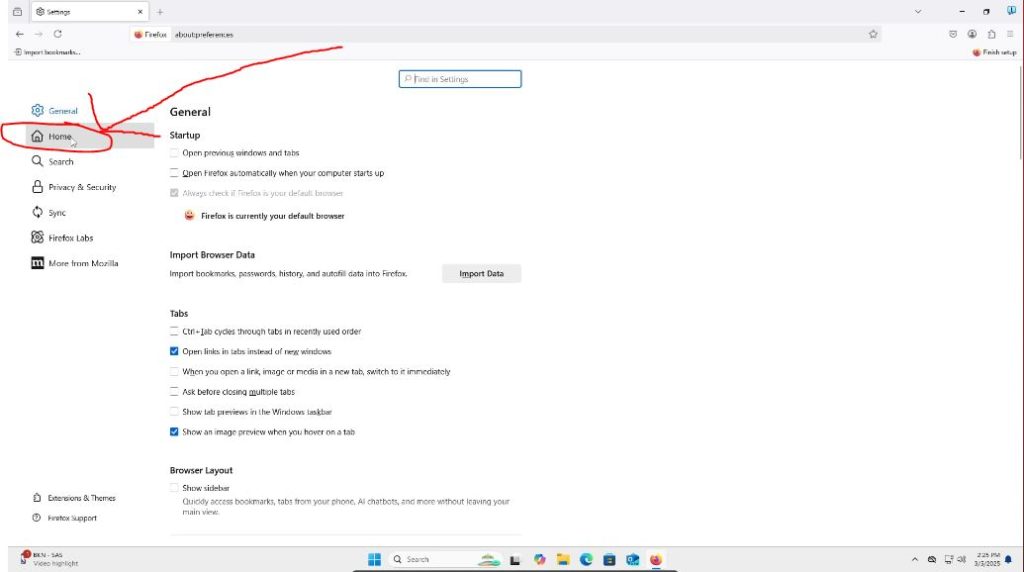
We are then taken to a page that looks like this below. We can then uncheck the check boxes I circled in red. But please feel free to leave what you would like. Note, these changes are automatically saved and there is not a save button you need to click.
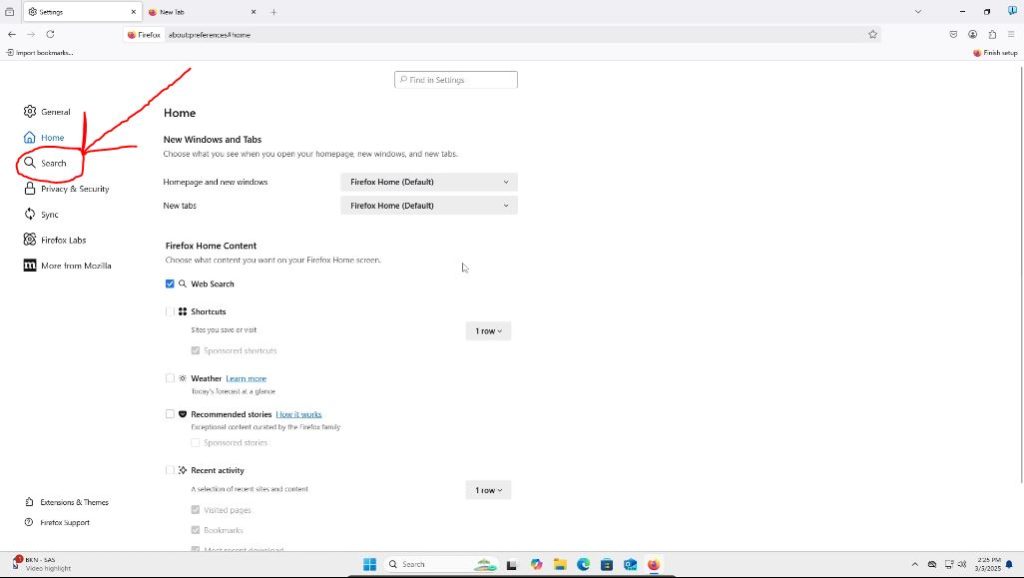
This is an optional step, just like the above step to disable the cluttered home screen. But I am going to change the default browser search Engine from Google to DuckDuckGo. As I mentioned above, Google collects a ton of data on their users which I am not a big fan of. I find that DuckDuckGo respects user data while giving pretty quality search results. I haven’t had any complaints since I switched. To do this, click on “Search” on the left hand side of the screen.
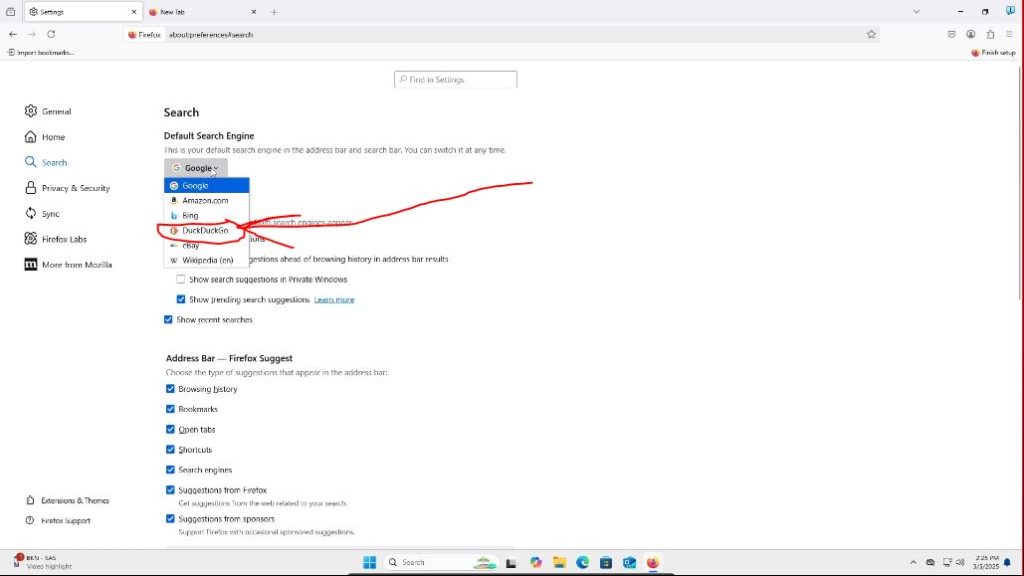
When the new page opens, find “Default Search Engine” at the top of the page. It likely be set to Google with a drop down menu. Click on this drop down menu and choose your search engine of choice, although I definitely recommend DuckDuckGo. Again, this choice automatically saves and updates.
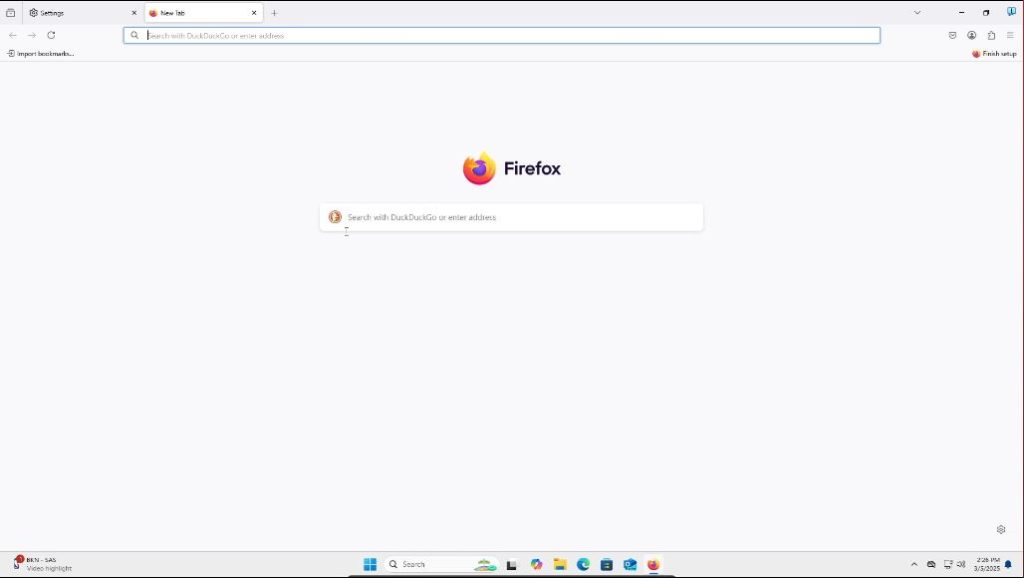
Now we can open a new tab and see a distraction free Firefox home page!
Installing Browser Extensions
We will be installing the browser extensions “uBlock Origin” and “I still don’t care about cookies.” uBlock Origin will block ads from loading on web pages. (If you are curious about the ethics of ad blocking, check out my blog post about that here). I still don’t care about cookies blocks most sites from having cookie pop ups by automatically declining cookie usage when you enter a site. I have noticed it doesn’t work on every site, but majority of sites. Note – These extensions can sometimes break websites or websites can detect ad blocking usage. I will show you how you can disable the extensions if this ever happens as well.
We can start by searching for “uBlock Origin Mozilla Firefox Download” or you can click or copy/paste this link – https://addons.mozilla.org/en-US/firefox/addon/ublock-origin/
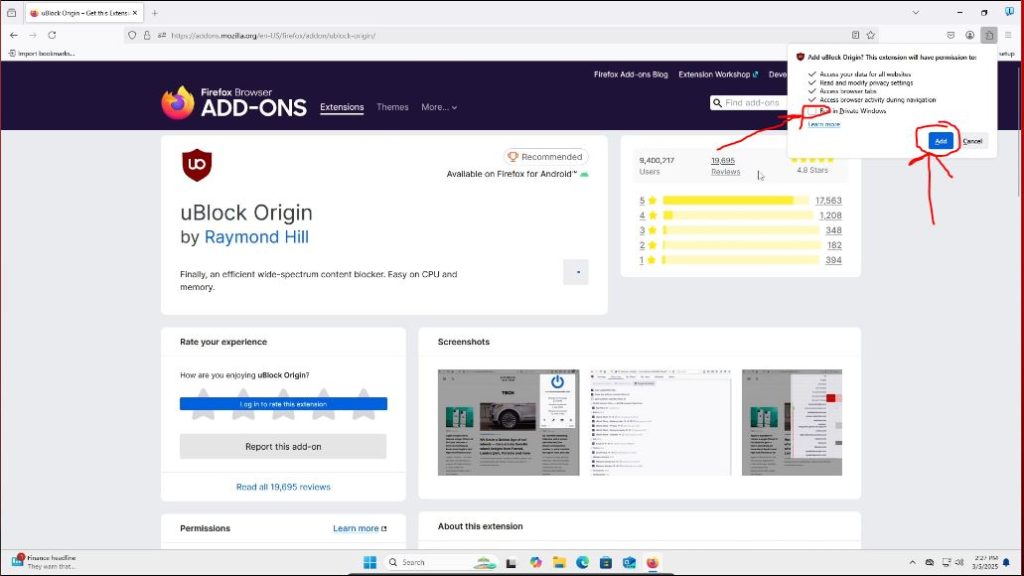
We should then come to a page that looks like this. Make sure it looks the same as this. Such as by the same author and reviews. It would not surprise if there are duplicate browser extensions of this that are actually malware looking to snag unsuspecting people. But, all we have to do is press the “Add to Firefox button.”

We will then get a Firefox popup in the top right corner of our browser. If you would like, select to run the extension in private windows and press the “Add” button.
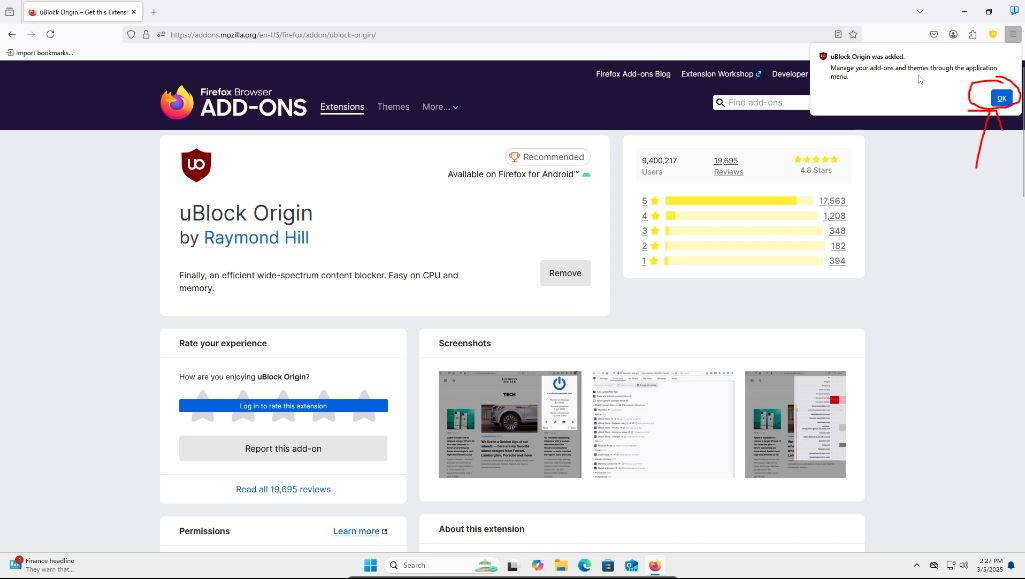
You will then get another window saying the extension has been installed. Press “OK.” This is all we have to do for it to install. We are all done with this extension.
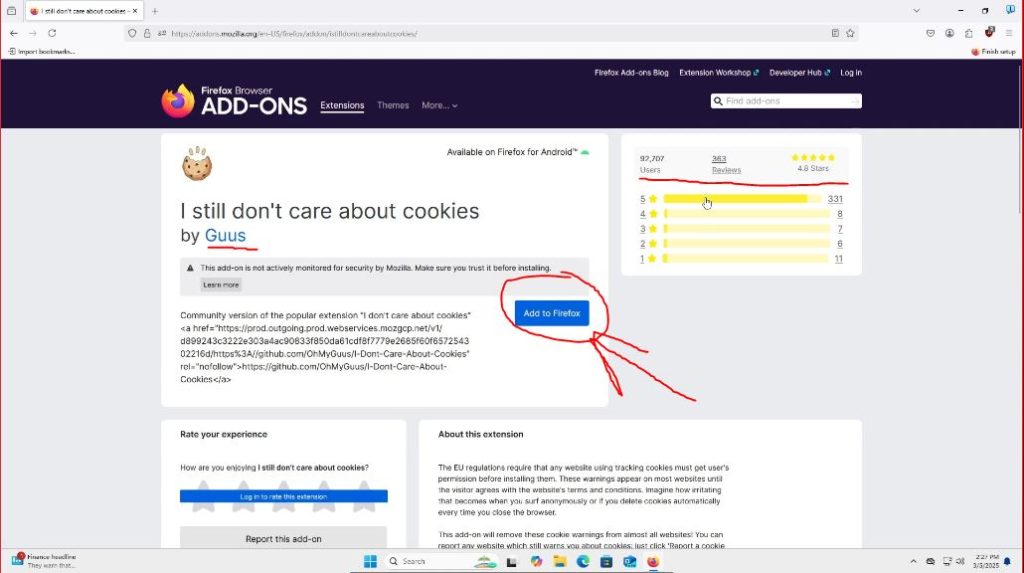
Now we will be installing the “I still don’t care about cookies” extension. To do so we will follow very similar steps as above. We can start by opening up a new browser tab and searching for “I still don’t care about cookies” Firefox extension or by clicking or copy/pasting this link: https://addons.mozilla.org/en-US/firefox/addon/istilldontcareaboutcookies/
We will be taken to a page that looks like this below. Again make sure it is the same one by looking at the author and reviews. The previous version of this extension, “I don’t care about cookies” was apparently bought out and then started taking peoples’ data. So lets use this. We will press “Add to Firefox” like we did before.
And just like with uBlock Origin above. We will be prompted on the top right hand corner from Firefox to allow this in private windows and adding the extension. Check allow in private windows if you would like and click “Add.”
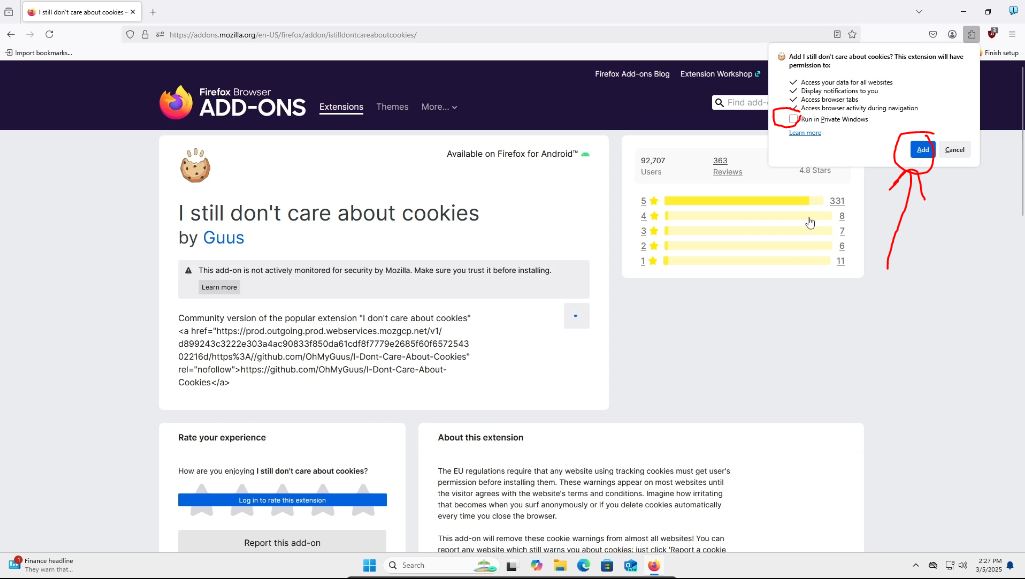
We will get another popup like before. We can press “OK” again.

Now that the extensions are installed, let’s see how to disable them if the need ever arises. From your Mozilla Firefox homepage, go to the puzzle piece in the top right hand corner and click on it.
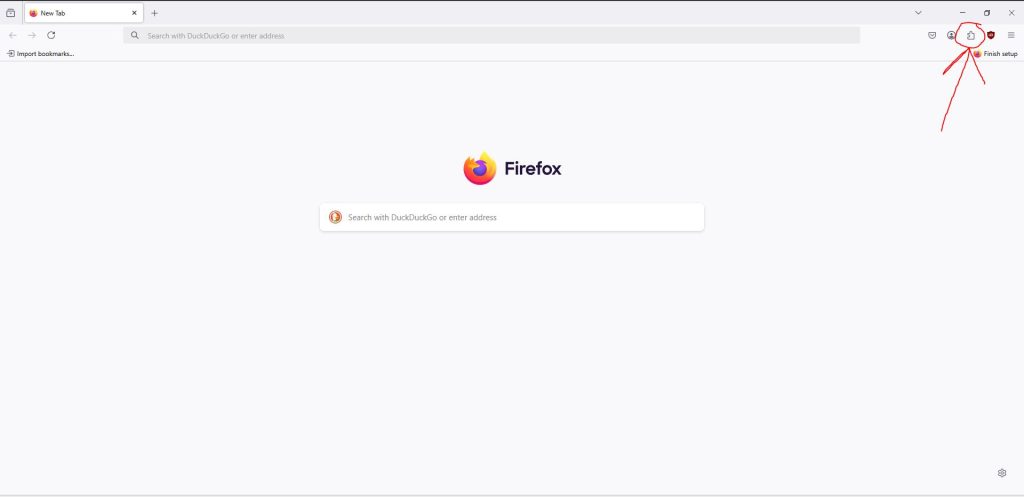
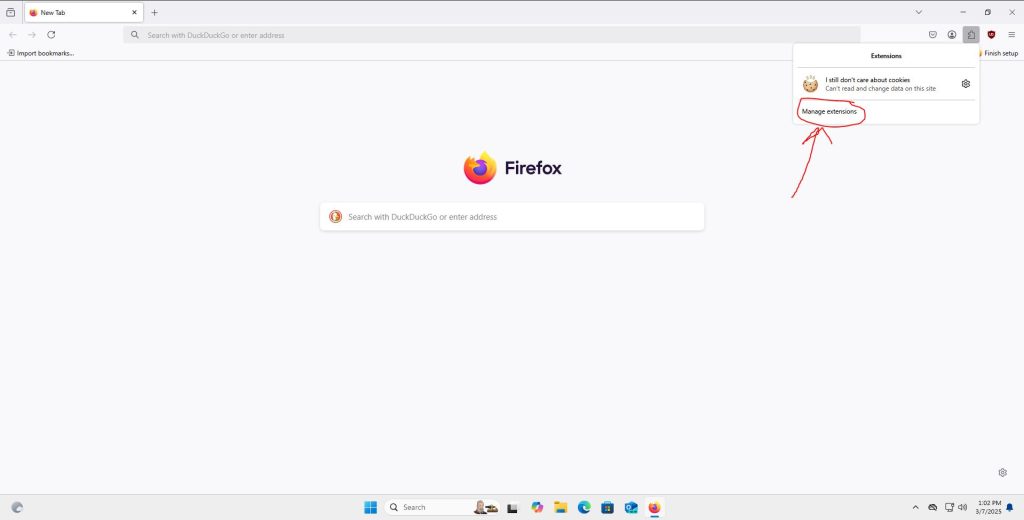
A preview of your extensions will popup. We want to click on manage extensions.
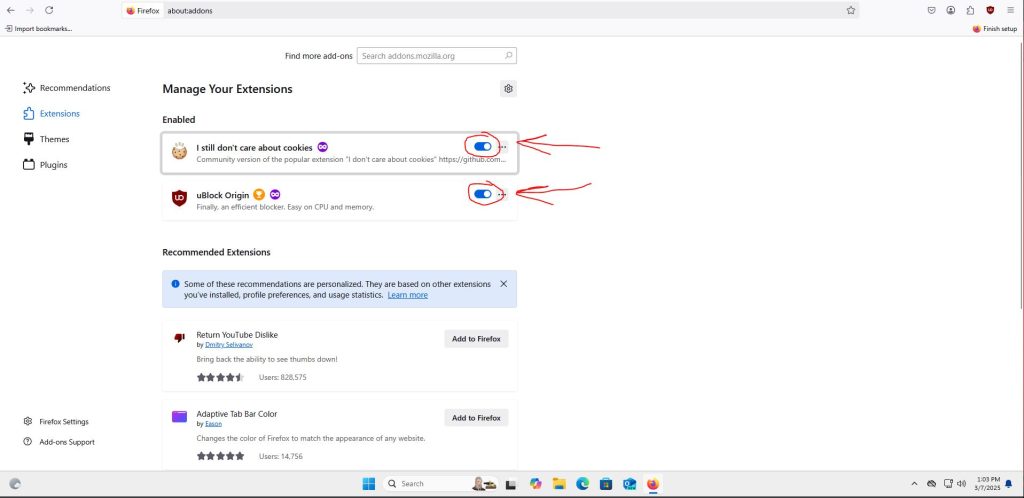
We then can see our installed extensions. You can toggle them on or off by clicking the little switch button on the right side of the extension like we see below. As you can see, they are on when the circle is to the right with blue showing on the left. We will leave these as is, but it is good to know.
We have now successfully installed an ad and cookie blocker! There is still one final step for distraction free web viewing though. And that is disabling Google account pop-ups.
Disabling Google Account Popups
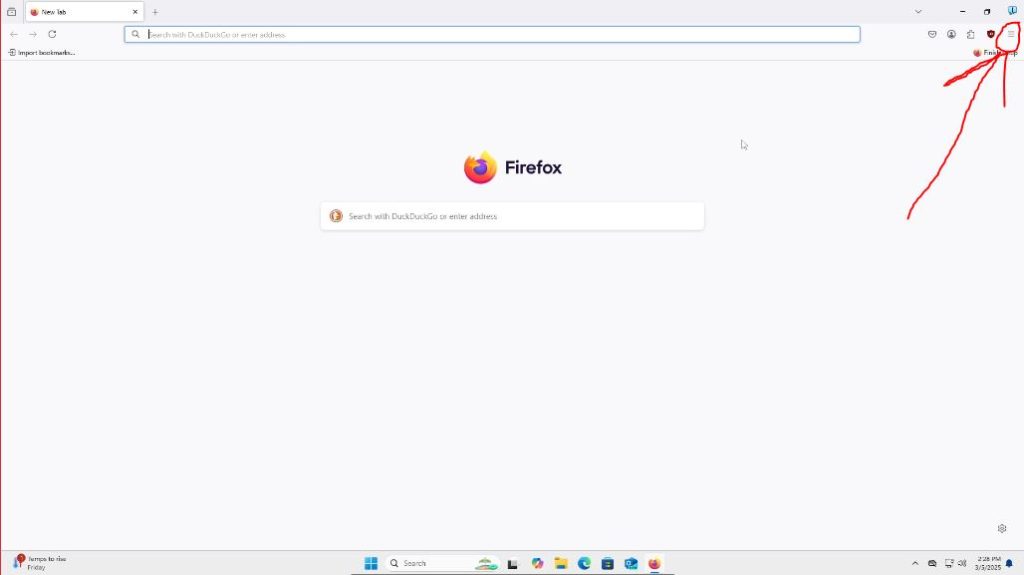
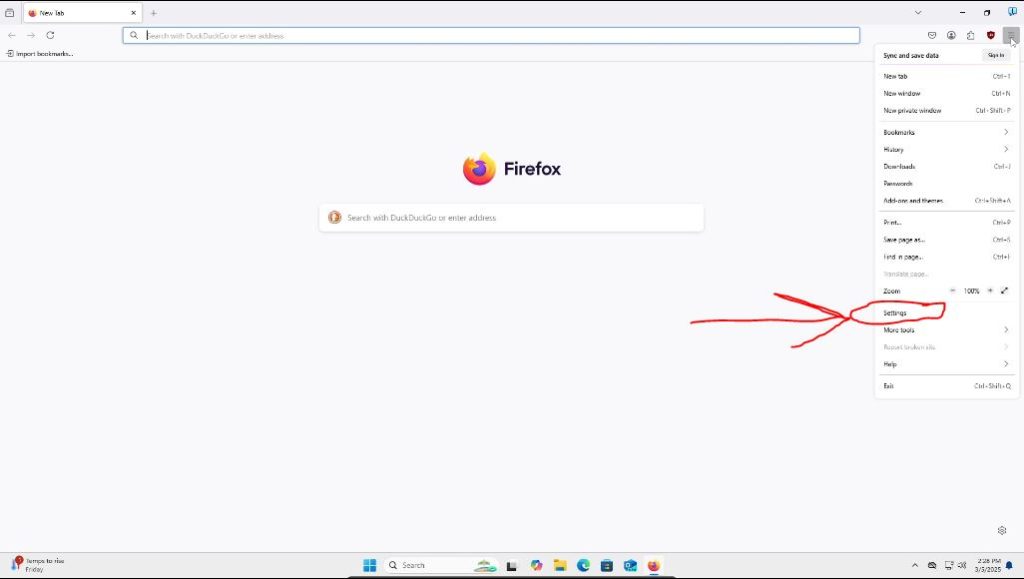
Many websites include popups when your first load in to sign in with your Google account. This is poor security practice and annoying. To disable this for most sites, we can follow the same steps above to view the installed extensions or follow these steps as an alternative. From your Firefox home page click on the three line hamburger icon in the top right hand corner of the browser.
Then once the options menu pops up on the right hand side, we can click on settings.
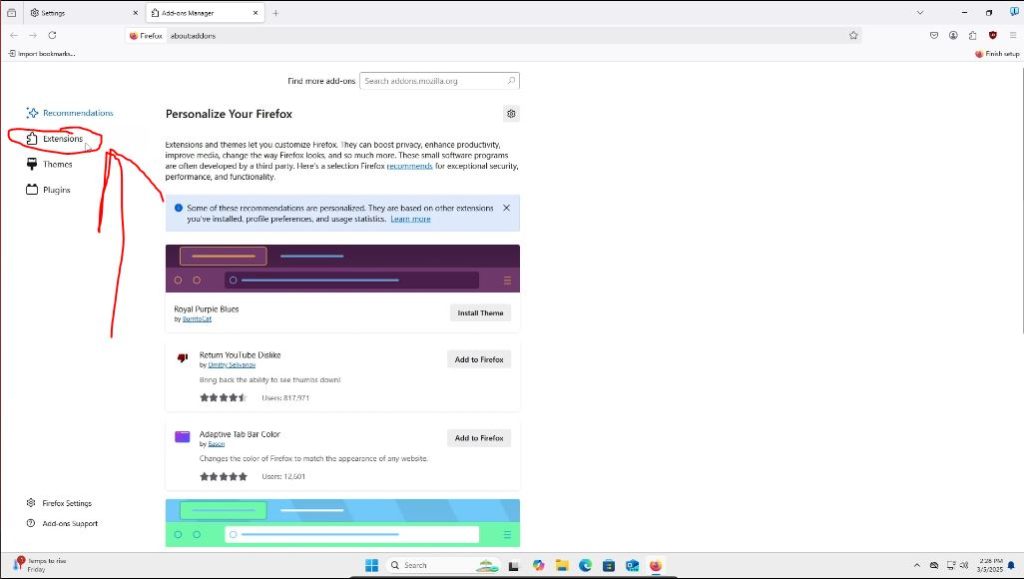
When we are in the generic settings landing page, we can then click on “Extensions and Themes” on the bottom left corner of the page.

We will then be taken to another generic landing page. We can click on “Extensions” on the left side of the page.
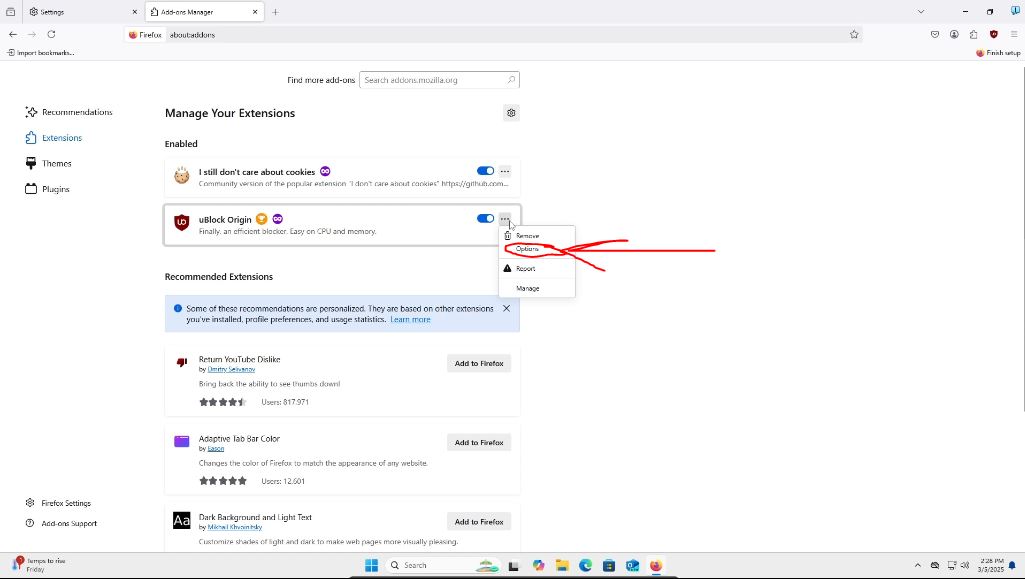
We will be taken to a page where we can manage our extensions. We want to click on the 3 dot “…” icon on the right side of the uBlock Origin extension.

A small menu will popup. We want to click on “Options.”
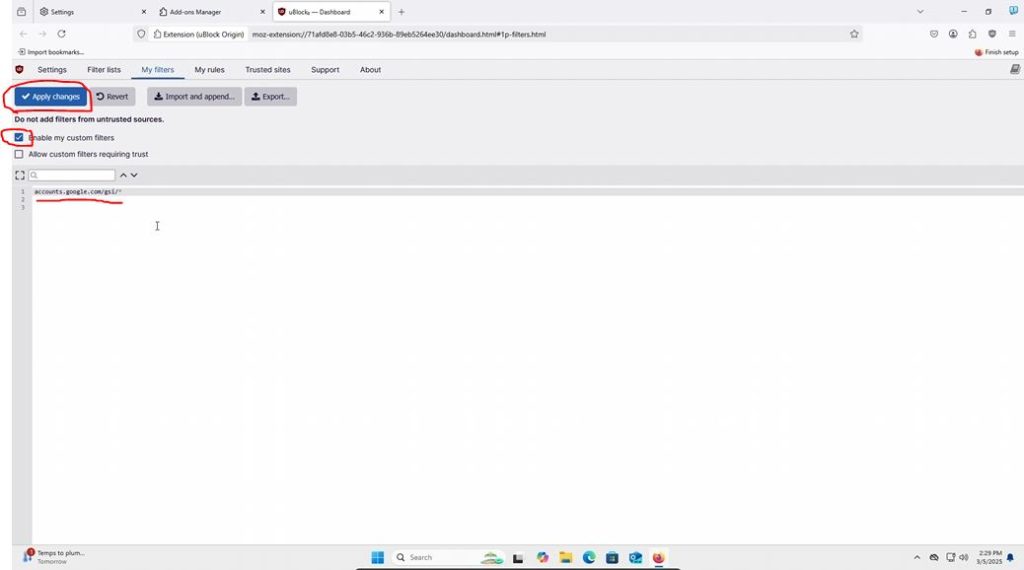
We will then be taken to a confusing settings page. We can ignore this. We want to click on the “My Filters Tab.”
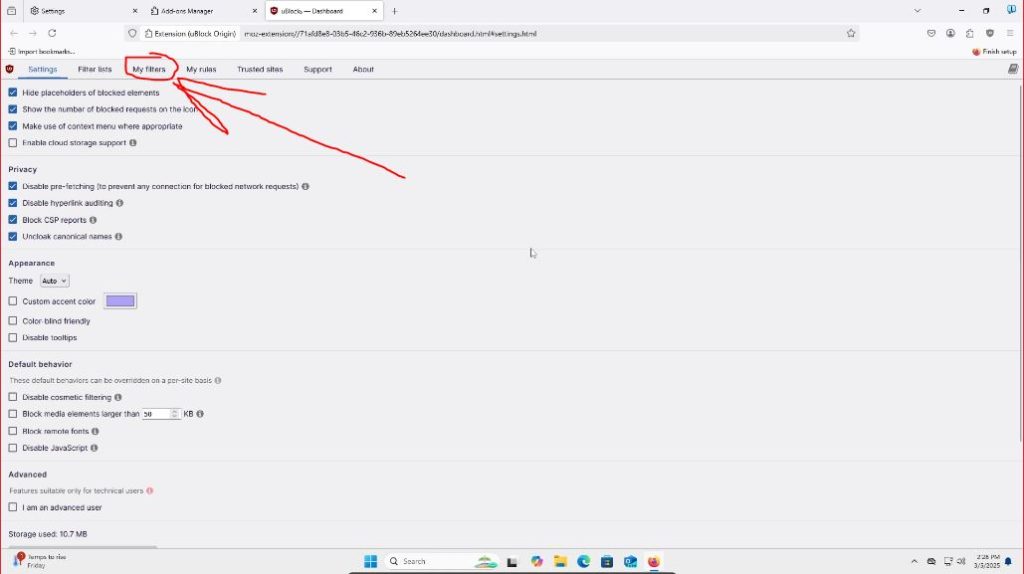
Here we will type in or copy/paste on the first line “accounts.google.com/gsi/*”
Do not put the quotes, but the link inside the quotes ” ” including the asterisk *.
We want to make sure the “Enable my filters” box is check and we must press “Apply Changes” in the top left corner.
We are now all done! Thank you for sticking with me for so long! You can open a new tab and try out your favorite websites and see how they look now. I hope this allows you to have distraction free viewing environment!
Thank you for reading this how-to guide! I hope it was helpful! If you have any thoughts, comments, criticisms, tips, or new posts you want to see, please let me know below or contact me directly at surfinghyperlinks@gmail.com. If you want to sign up for alerts about new posts, please subscribe to my mailing list here. If you are able to and want to, please consider supporting my work here, but please do not feel obligated! Thank you so much again! Keep on surfing the web!
Comments:
2 responses

Good shout.
Leave a Reply to Henry Cancel reply